How to Make Greek Yogurt at Home

If the supermarket shelves are any indication, much of the nation is as in love with Greek yogurt as Jo and I are. A while ago I developed a method for making quick Greek yogurt by straining the store-bought stuff, and I thought I had Greek yogurt all figured out. That is, until last summer when Jo and I visited Greece. We had a bowl of fresh yogurt in a tiny cafe in Mykonos and realized that the stuff we'd been getting back home wasn't even close to the heavenly yogurt that was possible.
We decided that it was the freshness that was missing in the yogurt from the store. I needed to figure out a way to make my own Greek yogurt from scratch so that we could continue to enjoy that tasty treat without having to travel back to Greece (although that wouldn't be so bad).
After some research and experimentation, I came up with a technique that works very well for me, and now I can show you how to make your own homemade Greek yogurt with basic kitchen supplies and only two ingredients — milk and some starter yogurt.
Step 1: Prepare the milk
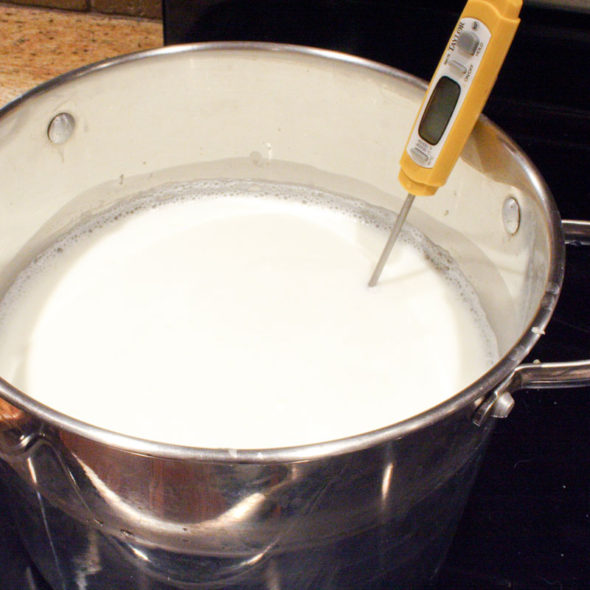
Pour a gallon of milk into a large pot. You can use whole or 2%, depending on how rich you want your yogurt to be. I personally love using whole, but 2% does save on some calories! Stick an instant-read thermometer on the side of the pan. Use any type of thermometer you have, as long as it shows temps in the range of 100 to 180.
Bring the milk up to 180 degrees F to re-pasteurize it. This will ensure that any of the bad germs are killed so that the "good" yogurt cultures you're going to add can have a clean slate to work with. You can do this on the stovetop over medium heat, watching it carefully so that it doesn't go past 180.
Once the milk has reached 180, remove it from the heat and let it cool down to between 105 and 110 degrees F. I just turn off the heat and keep an eye on it over an hour or so, stirring it occasionally, until the temperature is in that range.
Step 2: Add the culture
While the milk is cooling, prepare your yogurt starter. You can buy lots of varieties of yogurt culture starters if you want to experiment with regional or heirloom flavors. But if you want to keep things simple, just buy a container of yogurt at the grocery store to use as your starter. Choose any brand of yogurt you like, as long as it is plain (not flavored) and has active, live cultures. Make sure to check the label to be sure it has the live cultures, or else this won't work. My first starter was made with Fage, which was my favorite brand of Greek yogurt before I started making my own.
By the way, once you've made a batch of yogurt, you'll be able to use the last bit of it as the starter for your next batch, which means you may never have to buy yogurt again!
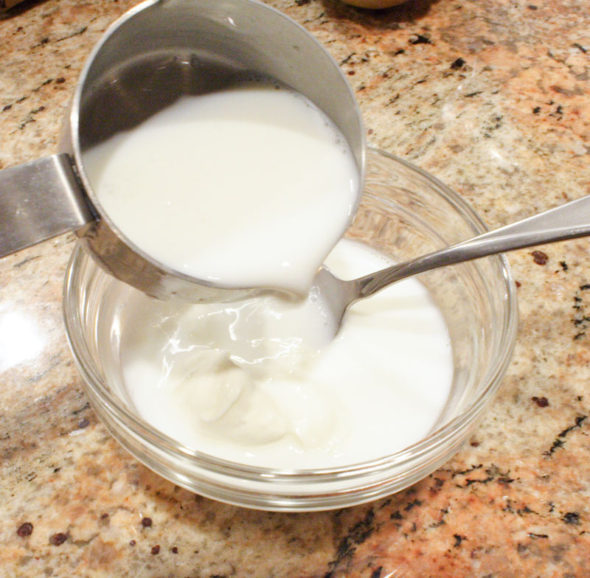
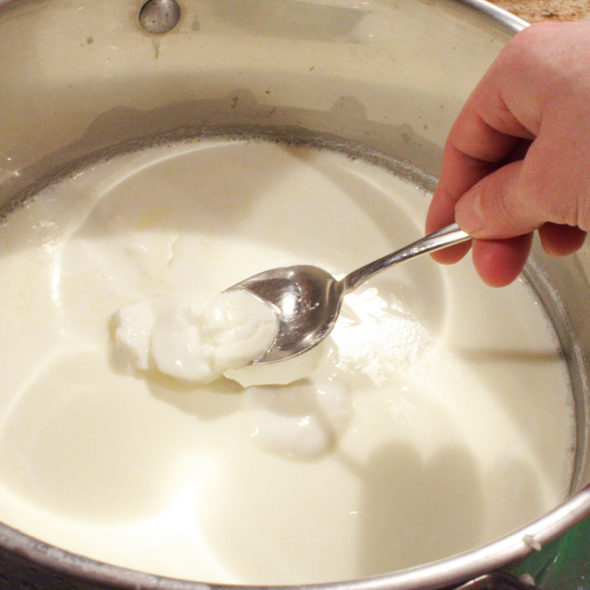
Put three tablespoons of your starter yogurt in a small bowl and add 1/2 cup of the warm milk. Stir until completely smooth.
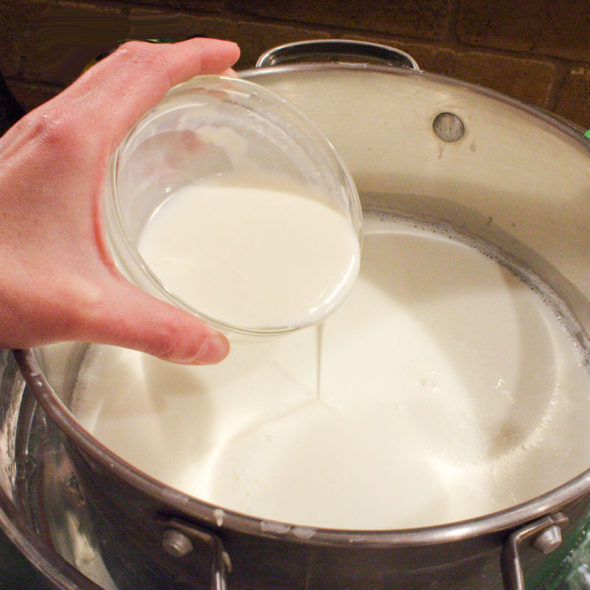
Pour the yogurt mix back into the rest of the milk and stir well. PLEASE make sure your milk has cooled to under 110 degrees here (105 is even better). If your milk is too hot, you will kill all those live cultures in the starter and your yogurt won't set up at all. Be patient and let it cool properly — it's worth it!
Step 3: Incubate the yogurt
To allow the cultures to work, you're going to need to keep the yogurt warm, between 100 and 110 degrees F. There are many ways you can do this, and I'll describe four that each have their own advantages and disadvantages.
Method 1: A lighted oven
The easiest and least inexpensive way to keep your yogurt at temperature is to put it into an oven that is turned off but has the light on. Most lightbulbs will provide a just enough heat to keep the temperature where you want it. Watch it carefully, though, and don't open the door or else the little heat you have will escape. Instead, keep an eye on the temperature with an inexpensive oven thermometer. If your bulb doesn't get hot enough, you may need to turn the oven on briefly every couple of hours.
Method 2: A heating pad
If you already have a heating pad in your home, it can make a great heater to keep your yogurt warm. Set it on the lowest setting and put your pan on top, wrapped in a towel. This is an expensive and easy method, but it's critical that your temperature not exceed 110 F, so you need to watch it very carefully.
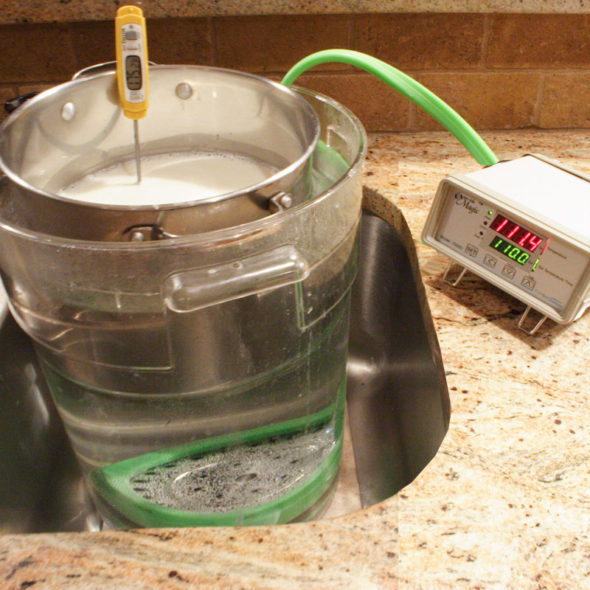
Method 3: Sous vide water bath
A temperature-controlled water bath is the ideal method for keeping your yogurt at the exact temperature. I happen to have a sous vide setup that I use both for cooking and for home cheesemaking. (That's a story for another day!) The benefit to this approach is that it's useful for other cooking techniques, it will provide spot-on temperature management, and you don't have to check on it at all. The downside is that it can be quite costly.
Method 4: Yogurt cooker
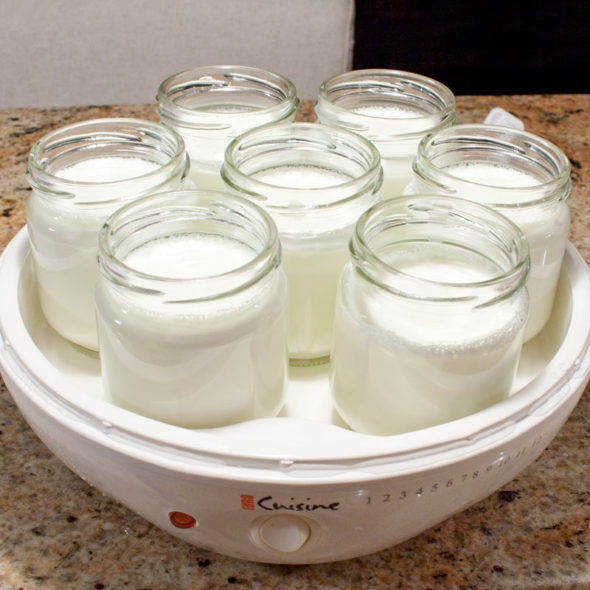
The most reliable and cost-effective way to get consistently great results with home yogurt making is to invest in a small yogurt maker. I have a Euro Cuisine Yogurt Maker that I use for making smaller batches when I don't want to haul out the sous vide setup. Sure, it's a dedicated appliance that doesn't do anything besides make yogurt, but it makes it so well that I think it's worth it! And it comes with the cutest little serving jars you've ever seen.
Whichever method you choose, you'll now want to cover the yogurt (with a clean towel or the lid) and keep it between 105 and 110 for about 7-10 hours (or overnight if you need to).
When the yogurt has set, it'll be scoopable with a spoon. Pretty neat, huh?
Step 4: Strain the yogurt
The yogurt may be set and ready to eat, but in my opinion it is still too thin to eat. I prefer the thick, rich, consistency of Greek yogurt, and fortunately that's easy to achieve simply by straining it to remove the extra whey.
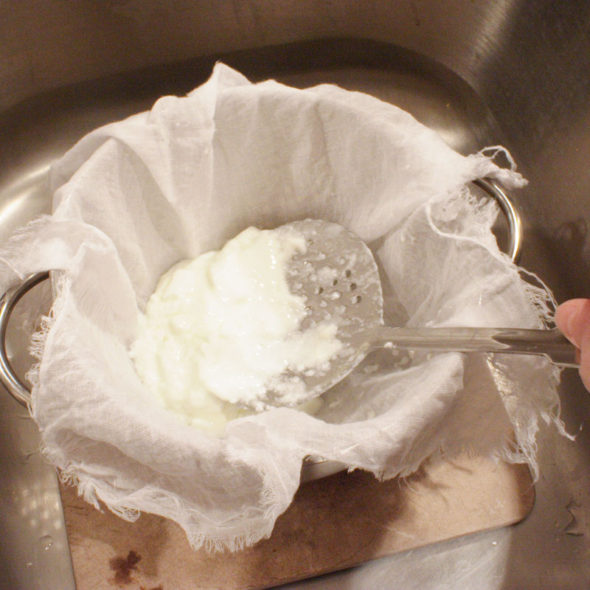
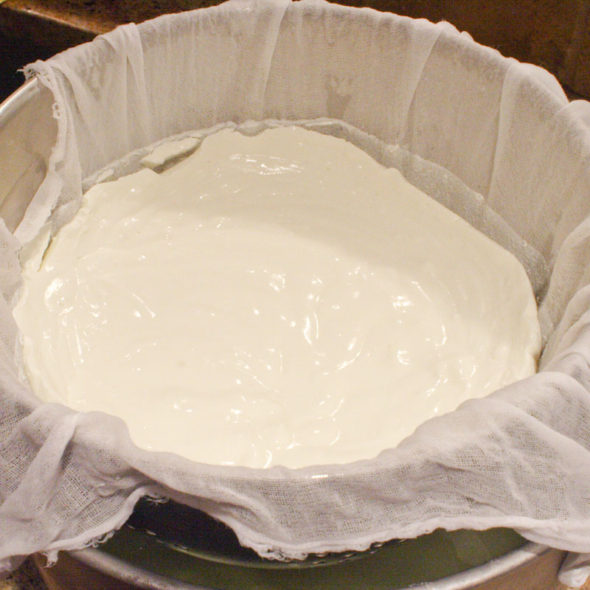
Place a colander in a large bowl, and line the colander with a couple layers of fine cheesecloth or, better yet, butter muslin. This fabric is similar to cheesecloth, but better because it's a tighter weave and machine washable, so you can use it over and over again! (Tip: hem the edges to keep it from fraying in the washer.) Scoop the yogurt into the cloth using a large slotted spoon.
Let your yogurt drain in the fridge for at least 2-3 hours. Depending on how thick you want your yogurt, you can let it drain up to 6 hours. They whey will collect in the bowl and the yogurt will stay in the strainer. The whey is no longer needed for this recipe, but there are lots of other uses for it in your cooking or in the garden.
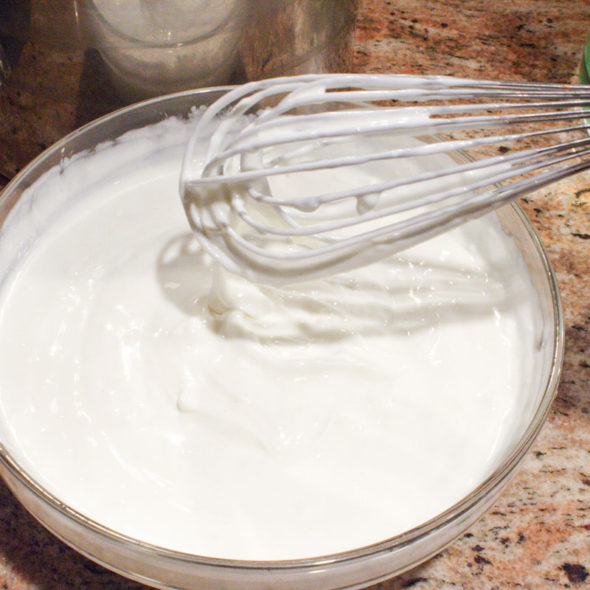
Dump the yogurt into a bowl and stir it with a whisk to smooth out any lumps. At this point you'll have a lovely regular-style yogurt that's ready to eat.
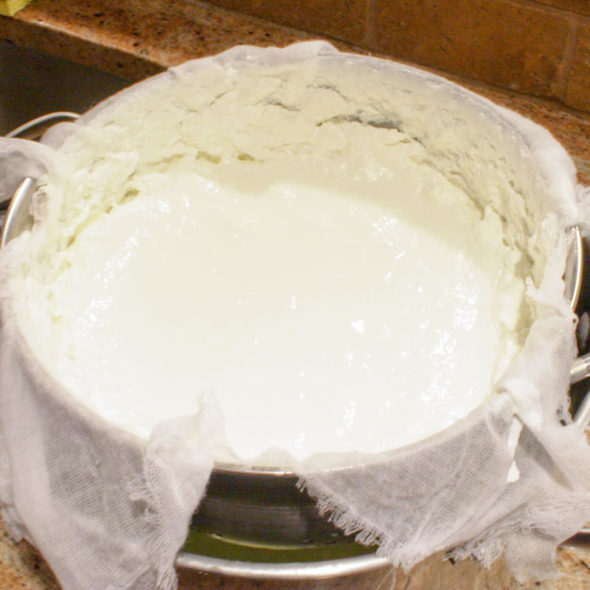
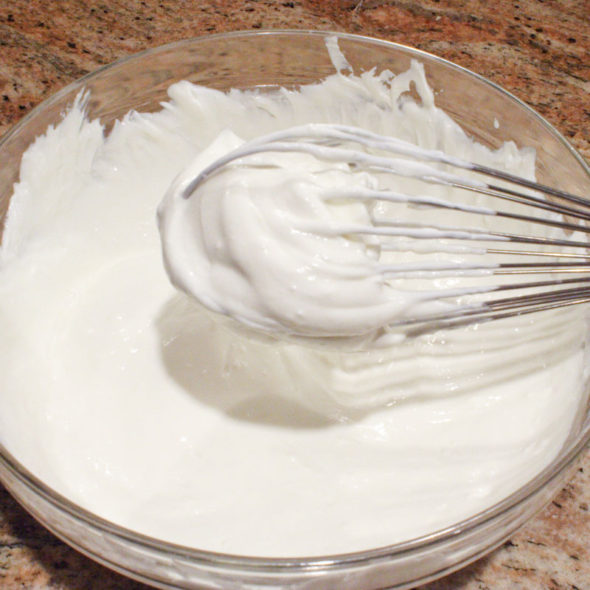
As I said earlier, though, my goal is thick and rich Greek-style yogurt. That means even more straining... a lot more! I pour the yogurt back into the colander with a freshly-rinsed piece of butter muslin and let it strain some more, anywhere from 1-2 days, until no more whey drips out.
This second strain will leave the yogurt thick enough that it stays in the whisk. Ah, perfect!
Whether you strain once or twice, you'll find this yogurt so much fresher and tastier than what you buy in the store. Jo and I agree that the Greek yogurt I make is as close to the stuff we had in Greece as I can ever get, and now we're so spoiled that we can't eat the store-bought stuff anymore!
This recipe will make from 4 to 6 cups of yogurt from a gallon of milk, depending on how much you strain it. Your homemade yogurt will last in the fridge for about a week. Be sure to save the last three tablespoons of yogurt to use as a starter in your next batch.
If you want to take time off between batches, measure out 3 tbsp and put it into a container in the freezer. Then you can just thaw it and use it as a starter whenever you're ready to make more yummy yogurt!
What do you like putting in your yogurt? I usually stick to honey and granola, but sometimes I add fresh strawberries. I've also been known to pour maple syrup on it. I'm always up for new ideas, though, so if you've got a favorite topping, share it with us.






23 comments so far:
ACK! Don't toss out the whey! It is VERY useful in a healthy kitchen!
You can also use the crockpot to incubate the yogurt after adding the cultures. I turn mine on low while I am heating and cooling the milk, then add the milk with cultures, turn it off, wrap in a beach towel and let sit over night.
And the whey can be used for as the liquid for lots of baking projects, so you don't really have to throw it out.
How about vanilla added to it?
Good point, Tez. I have heard great things about whey, but don't care for the taste. I plan to use it to water my garden this summer. Can you share some other tips with us on how to get the most out of it?
Mary, the crock pot is a great idea, thanks for sharing! I had not heard of using whey for baking projects... can you share some examples?
This is awesome! I LOVE greek yogurt but it gets expensive.
I just wanted to let you know that yours was the first crafty blog I ever started following years ago and it started a small obsession. The phone book organizer was the first project from a blog I tried! The obsession has grown so much so I finally just started my own. Since you were a big part of my inspiration, I'd love it if you had a spare minute to check it out and tell me what you think. http://beyondcookiecutter.blogspot.com/
Thanks for all the awesome projects and inspiration Chica and Jo! -Sheila :)
I make my yogurt in an ice chest filled with 115-120 degree water up to the rims of the wide mouth pint canning jars I like to use for yogurt. Usually done in between 2 to 3 hours. You need a water to jars ratio sufficient to keep the water above 100 degrees for the duration.
I use whey for the liquid when I bake bread.
If you are baking bread/biscuits/..., you can use the whey instead of water.
Sheila, it's so nice to hear that we've been able to inspire you to grow your crafting skills and also start your own blog. Best of luck with it!
Everyone else, thanks so much for all the advice on using whey. I've got lots of new techniques to try :)
I should warn those that haven't tried making your own yogurt...you will be spoiled! I can no longer eat yogurt bought in a store. Chica's is SOOOO good I can't go back!
Chica, thanks for sharing your yogurt site - yummy! I can hardly wait to try it. I agree with Mary, don't throw out the whey. It's too valuable. I am desperate for some. I use it for lacto-fermenting vegetables, making soaked pancakes, and all kinds of other yummy goodness.
You're quite welcome, Natasha. Clearly I need to look at all these whey uses you guys have mentioned -- I'm missing out!
I absolutely love Greek yogurt. I'm sure this will be amazing and I cannot wait to try it! My question is: how long will this yogurt last in the refrigerator. I'll probably never have to worry about it but, needed to ask. Thanks for all you do for us "not so crafty" people.
Teachermom, I've read that homemade yogurt will last 7-10 days in the fridge. To be extra safe, though, I only keep it for a week (on the rare occasion that I have any left, that is!)
I have always used my whey in soups!! Hate to waste anything!
I love to add Lime Young Living Essential oils, honey, and fresh raspberries.
My other favorite is cocoa powder, stevia, vanilla and fresh strawberries.
What a yummy sweet!!
Great ideas, Kimberly and Lis. Thanks for sharing!
I can't wait to try to make my own Greek yogurt. Just as soon as my new fridge arrives so I'll have room...
...another option for making yogourt is to put the milk-&-culture mix into wide-mouthed jars and then into a thermal cooker. To make standard (ie, not Greek style) yogourt, I use 2 x Imperial pints whole milk + 6 x tablespoons starter yogourt, to make 2 x 500ml. jars + 1 x 150ml. tub/jar. I then leave it for 10 hours, (keeping the smaller jar as my starter for next time). You could of course strain the yogourt in the way you suggest, to make Greek Style yogourt - delicious!
My mom would chop up green apples and put some cinnamon and brown sugar and chopped walnuts in mine? it was my favorite thing to eat every day.
Do you cover the yogurt while in the frig during the first and second strains? Hank you.
I use the excess cheese cloth to cover the top.
Can one make Greek yogurt from almond milk?
Kat, we have not tried this recipe with almond milk, but if you do, let us know how it goes!