DIY Southern Front Porch Renovation with Curb Appeal
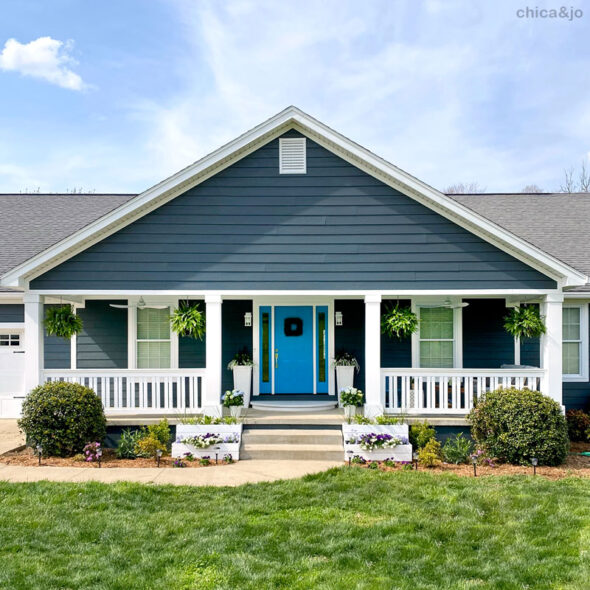
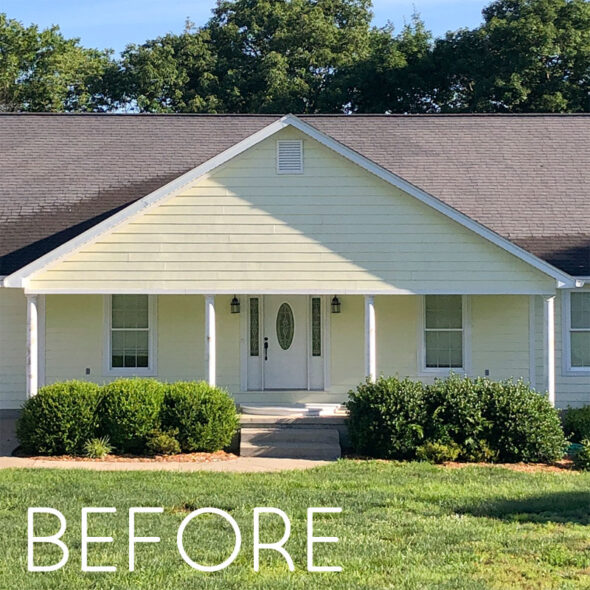
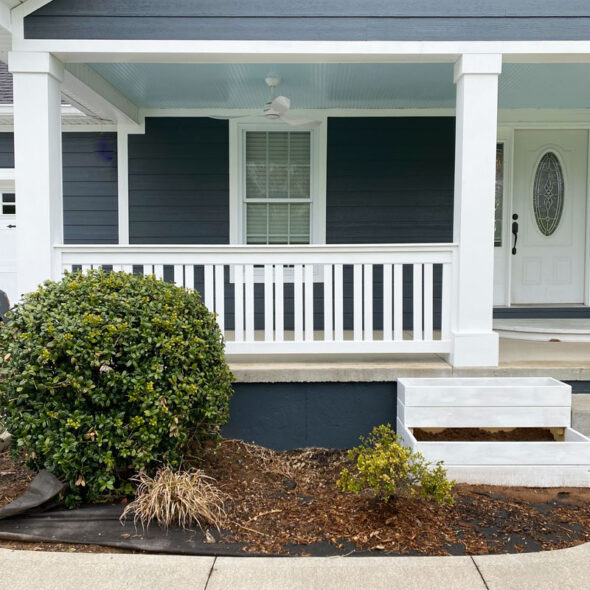
When we moved into our current lakefront home, my husband and I were so happy with the glorious windows and view from the back of the house that we kind of forgot all about the front of the house. It was fine, but just so boring. The house was painted a pale yellow color, the front door had completely the wrong look for us, and the huge front porch was a giant blank slate with no charm. This all added up to ZERO curb appeal!
So when we were offered an opportunity to work with The Home Depot on renovating this boring porch, we jumped at the chance. Jo and I addressed many aspects of the front porch during the renovation to maximize the curb appeal.
We found tons of inspiration and ideas for transforming an outdoor living space with Home Depot's outdoor project guides and jumped right in to work with projects involving paint, construction, a new door, and landscaping.
I'd love to share with you some of the things we did to update the front of my house into a cozy, Southern porch worth sitting on with a glass of lemonade or sweet tea.
Paint the house dark gray for bold contrast
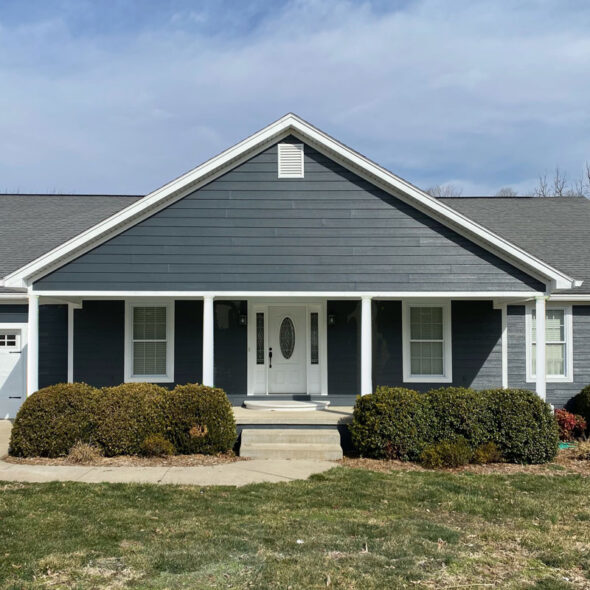
We knew the bland yellow color was the first thing to go. We decided to go for bold and chose a very dark gray called "Orion Gray" by Behr. I have to give credit to My Honey for picking out this color — he saw it on another house and convinced me to give it a try. He was so right! I love how the white trim pops against this high contrast color.
Paint the porch ceiling blue
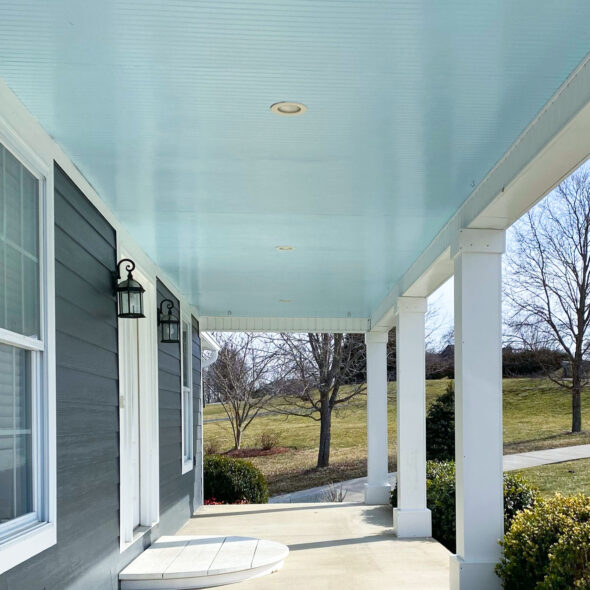
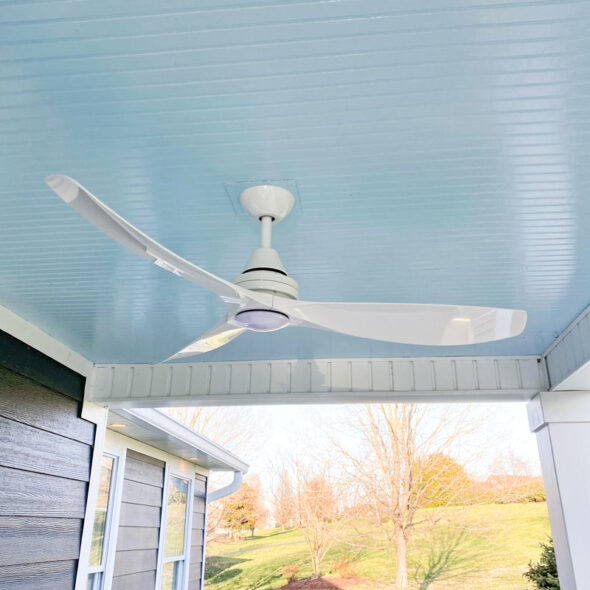
One thing I definitely wanted to do for a classic Southern front porch was to paint the ceiling blue. A light blue porch is something I've always loved, and this was my chance to finally do it! The blue ceiling color I chose is "Basin Blue" by Behr, which is just the right shade of light blue to serve as a subtle background but also pop out just the right amount.
Wrap the round columns to make them square
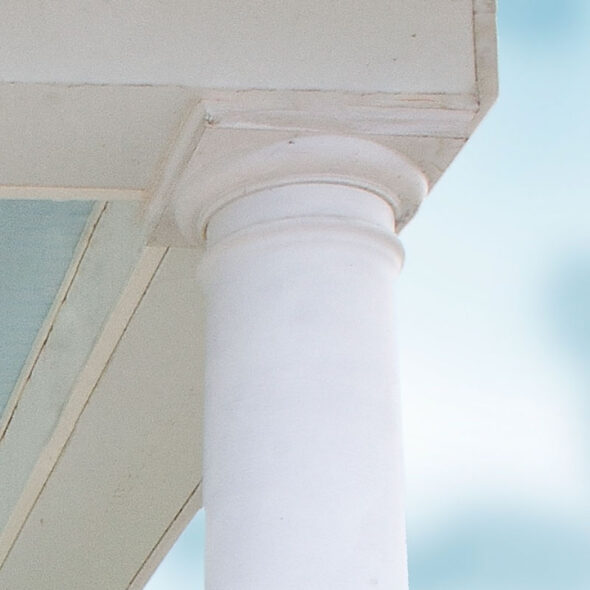
The columns that hold up the porch roof were originally round Tuscan columns that were too formal and just didn't fit the vibe I was looking for with a modern, yet casual porch. They were also a bit thin for the scale of the large porch, so I decided chunkier, square columns would be a much better look.
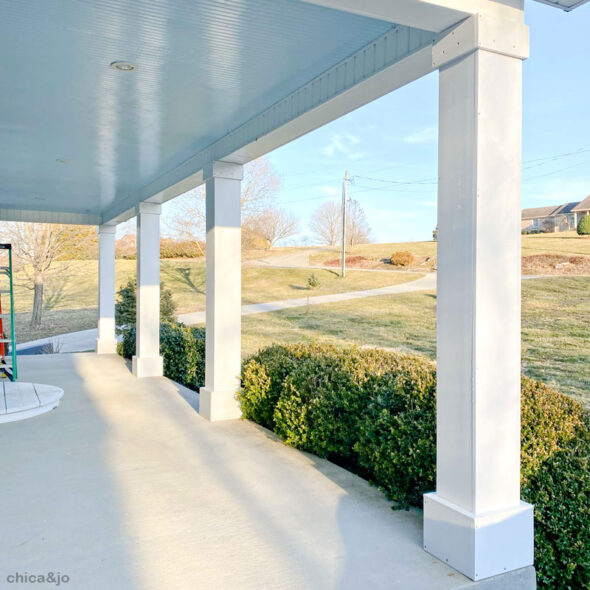
Removing and replacing the columns would be far too much work, and new columns are expensive, so I decided to just wrap the existing columns with new material to make them square.
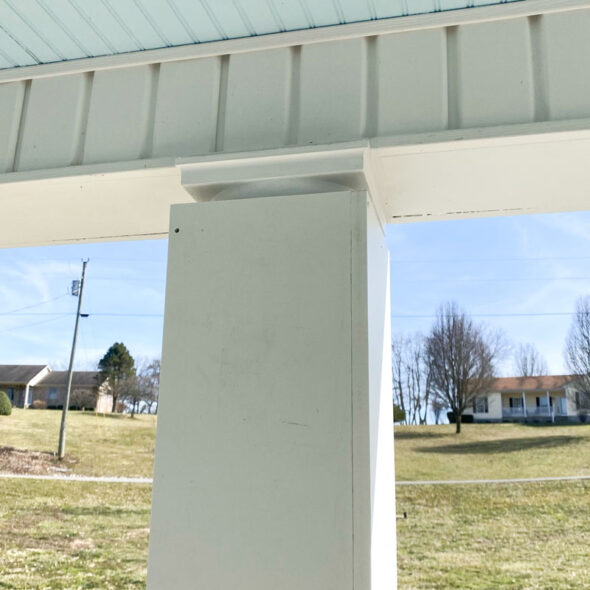
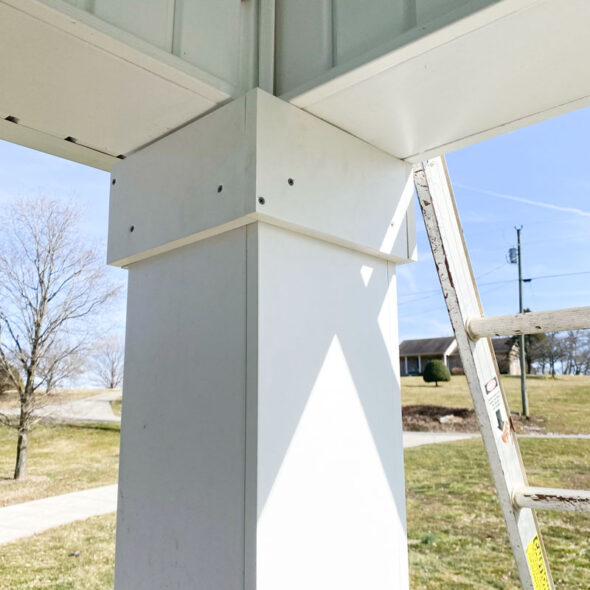
I decided to use PVC board to wrap my columns, since it's rot-proof and would never warp or wear out like wood would. I used four planks of 3/4" PVC trim board to wrap the round columns, keeping the new square column as narrow as I could. This meant stopping short of the column's cap and base, which were wider than the column itself.
Then I used more PVC board to trim out the top and bottom of the columns, covering the cap and base. I screwed the trim into the column wrap, and then into the original cap and base, making everything secure and stable.
I used narrower trim on the tops of the columns, and wider on the bottom, to give them a nice balance. Just look at what a huge difference this made!
Build a porch railing with a modern design
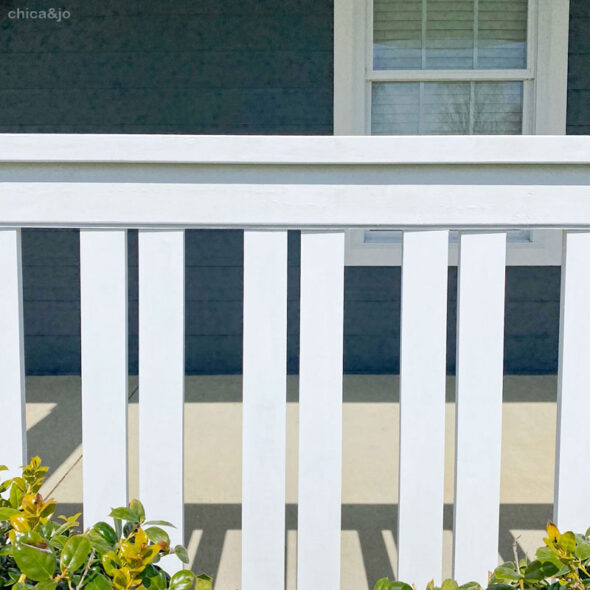
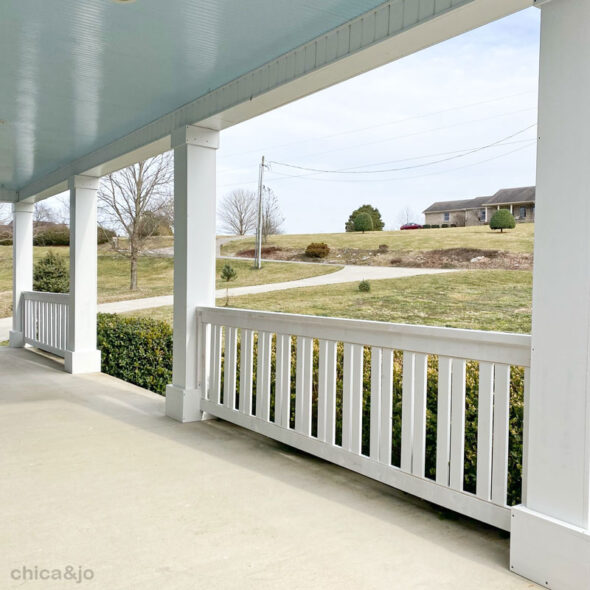
With the columns done, I was able to install railings that would really add to the cozy feel of the porch. Having square columns (instead of round) also made it a lot easier to attach the rails. The railings started with a whole bunch of 1x3 balusters, which we cut out of more PVC trim board.
I chose a very non-typical design and size for the balusters, to keep things modern and country at the same time. You can read full details here on how I built the railings, but the key design element was the spacing. I spaced them in pairs, with about 1 inch between them and 4 inches between each pair.
After installing the railing on both sides of the porch, I was so in love that I don't know how I ever lived without them in the first place. See our modern porch railing tutorial for more details if you'd like to recreate this look on your porch. I am obsessed with this unique baluster pattern!
Build planter boxes to anchor the steps
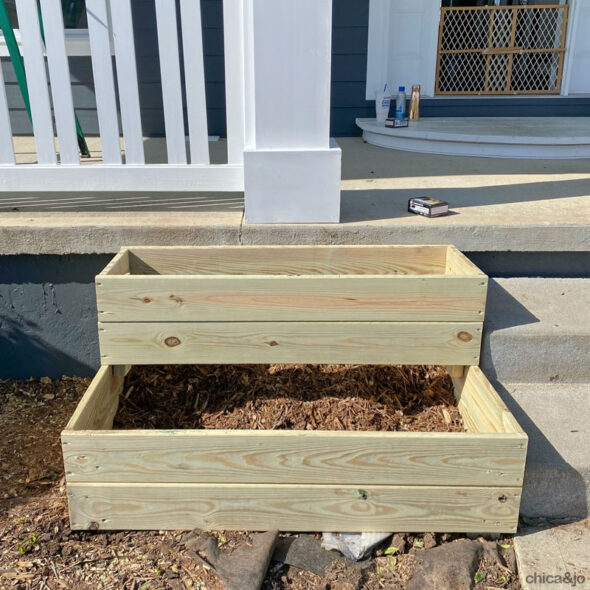
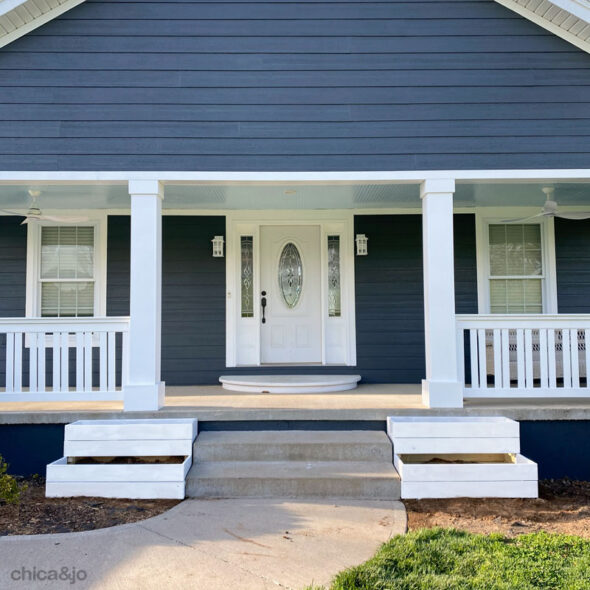
To anchor everything and make the steps a more seamless part of the front of the house, we built two big planter boxes, one for each side. Using 1x6 pressure-treated lumber, we built two basic rectangular shapes, stacked them, and reinforced all the corners with 2x4s to hold it all together.
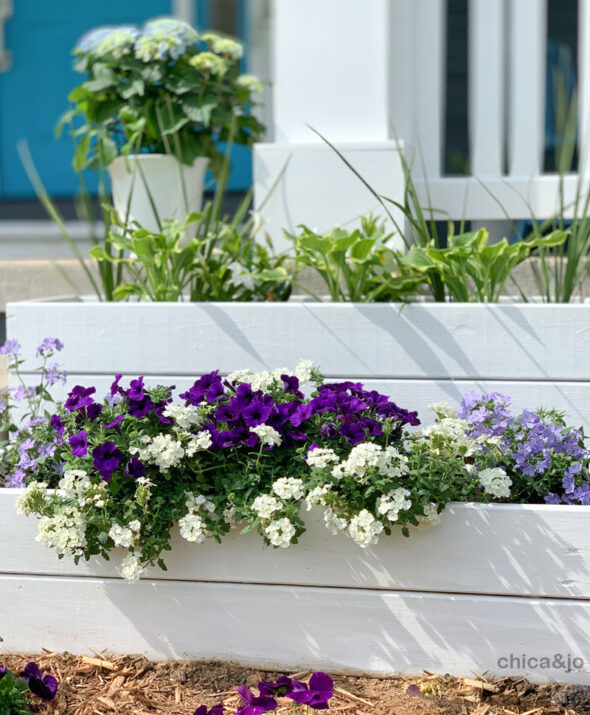
Once I painted them white, they were a gorgeous addition to the landscaping, and balanced the chunky square columns perfectly. They are just screaming to be filled with lovely plants and flowers!
Add ceiling fans and updated light fixtures
To add a cooling effect for those long summer days, we added two outdoor ceiling fans with remote controls and LED lights. We put one at each end of the porch, replacing the light fixtures that were there before.
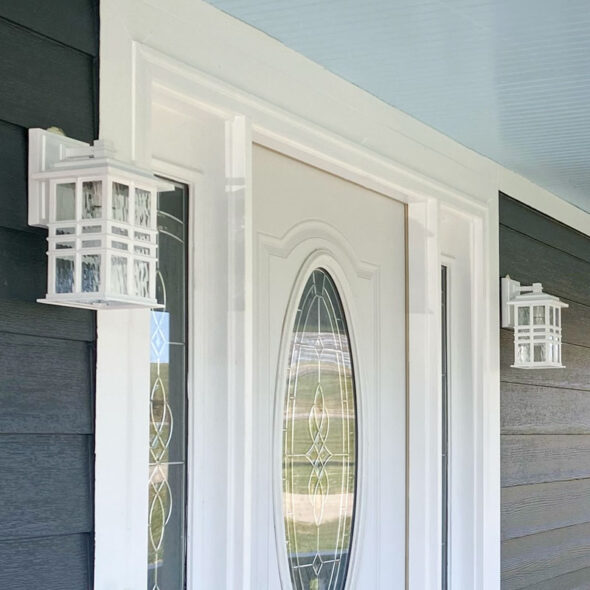
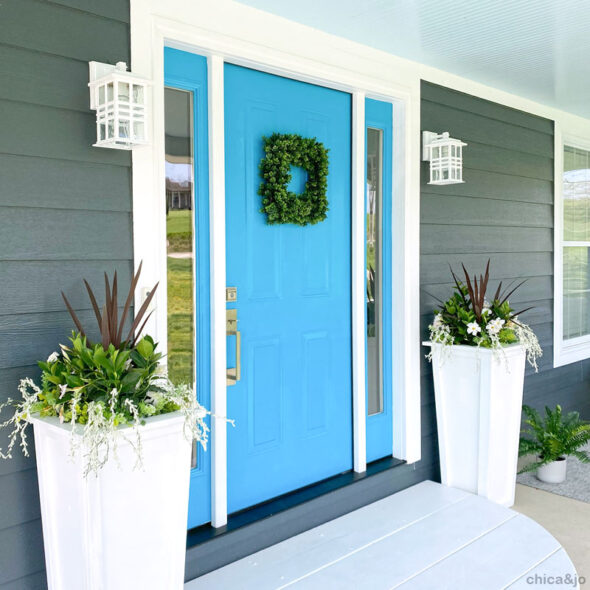
I also updated the lights on either side of the front door, which were in terrible shape and totally the wrong color for this new look. I chose new outdoor wall mount sconces with straight lines that matched the new design elements of the porch. And how much do you love that seeded glass?
Replace the front door with a new style and color
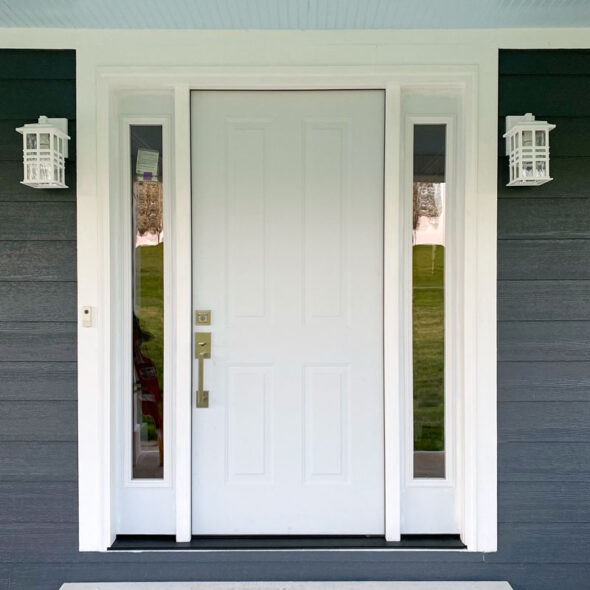
Speaking of the front door, it was in dire need of replacement. Even though it was perfectly functional and well-made, that oval stained glass design just wasn't for me! I decided to replace it with a new door with much cleaner lines, and clear glass to enhance our view of the beautiful rural area we live in.
With the help of Home Depot's door installation service, we got a professional measurement of the space and picked out a new door to fit. When it arrived and they installed it, I couldn't believe what a huge difference it made.
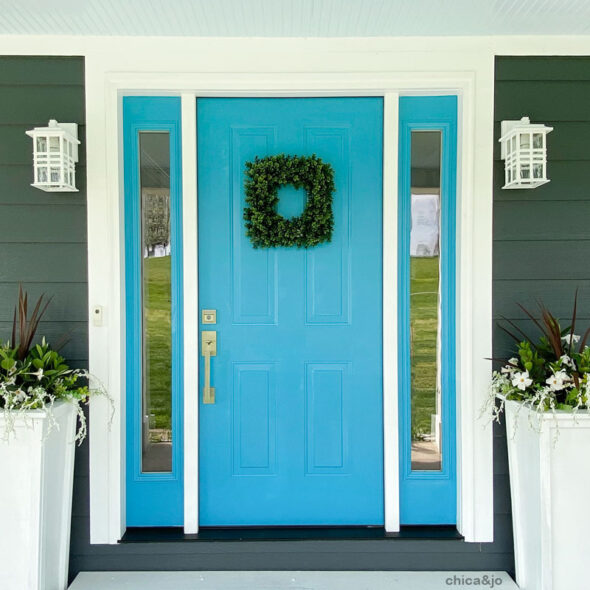
But to really bring the door to life, I knew it needed a bright new color. I chose Yucatan by Behr and could not be more thrilled with the results. I love this bright, fresh color!
To really dress up the door area, we built two tall, tapered planter boxes, one for each side of the door. It's amazing how some simple plywood and white paint can turn into a huge focal point to welcome guests!
Update the landscaping with shrubs, mulch, and lighting
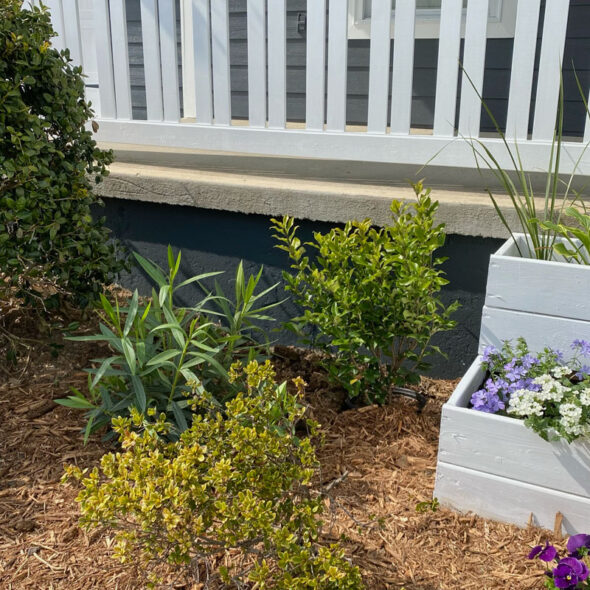
With all the construction and installation done, it was finally time to address the landscaping. We implemented several of Home Depot's ideas for building a better landscape to refresh this boring space. We pulled out several of the overgrown holly bushes and boxwoods, clearing a space for more attractive shrubs and flowers instead. It also made my beautiful new railings visible from the front yard.
Then we got to work digging and planting and bringing the landscaping to light with foliage and flowers. The landscaping how-to guides at HomeDepot.com really helped me plan for what I needed to enhance my curb appeal.
Filling the planters was probably my favorite part, because they just looked so great with the fresh new plants inside.
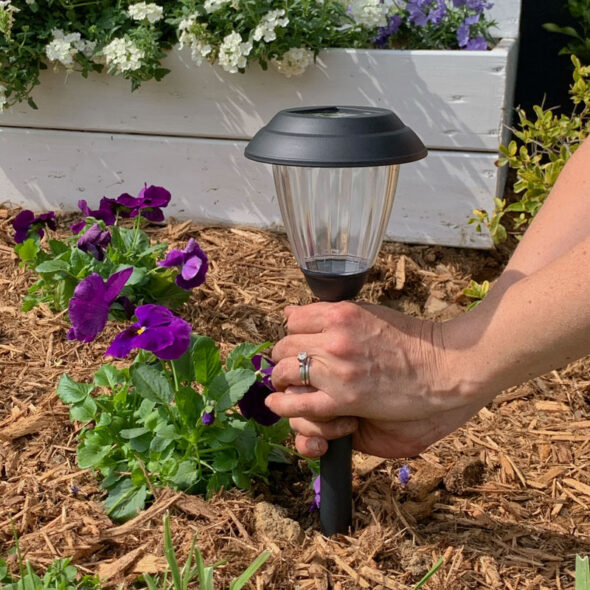
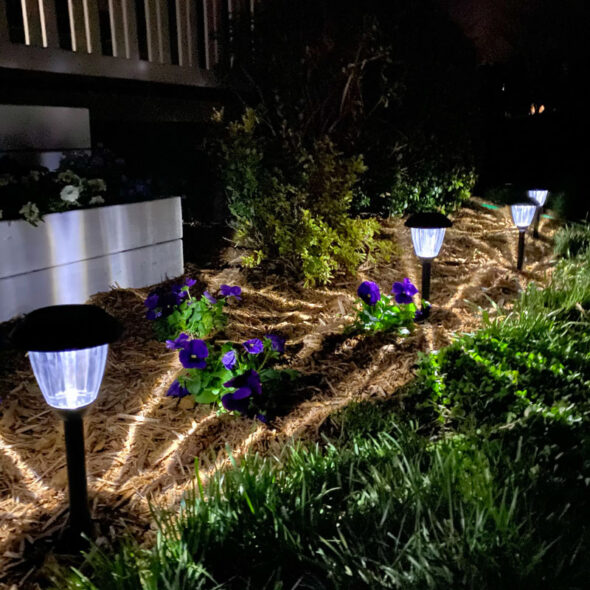
To make the area look good in the evening as well as during the day, we made sure to tuck plenty of path lights in amongst the plants.
I took the advice in Home Depot's landscape lighting guide and chose solar-powered lights. They charge all day from the sun, then light up at night to add a truly magical touch to the landscaping.
Decorate with cozy furniture and lots of flowers
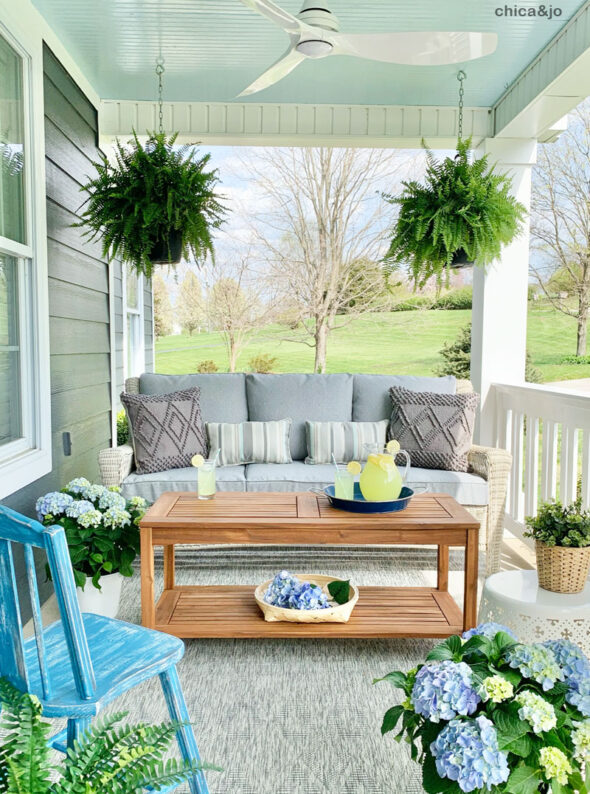
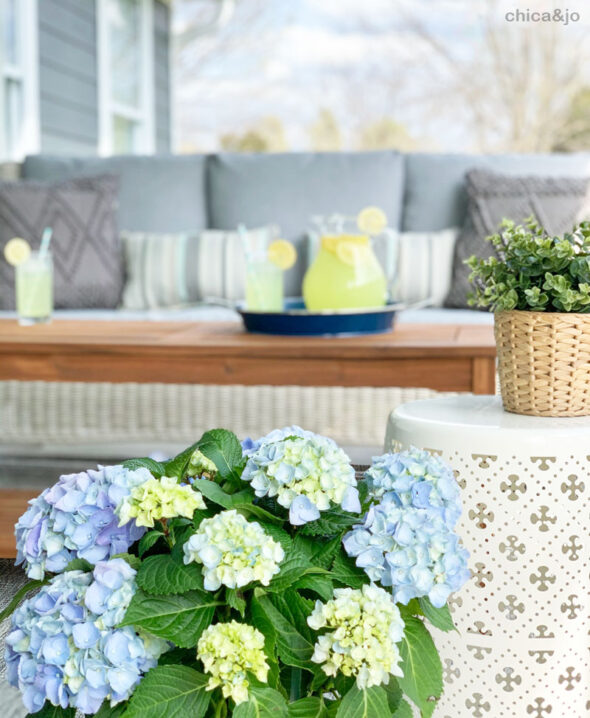
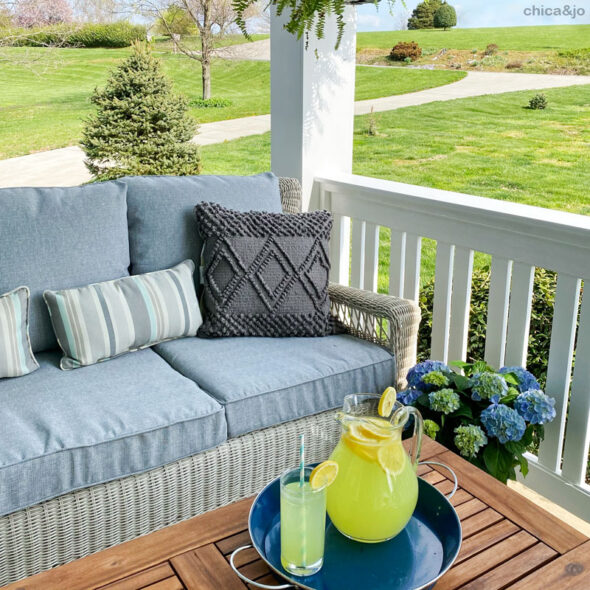
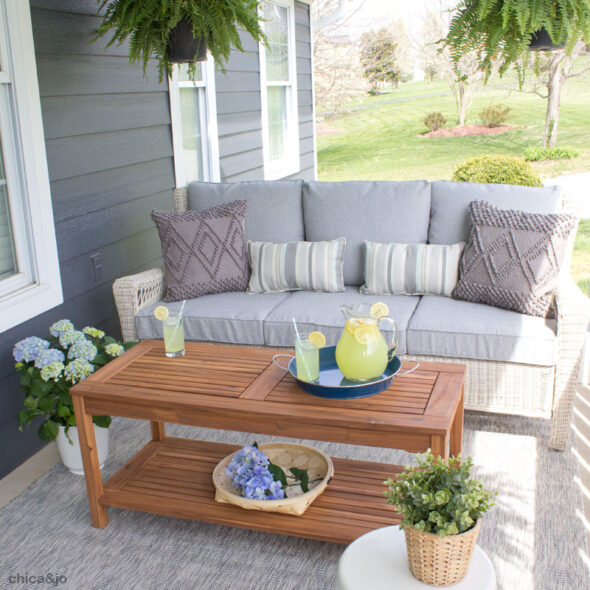
The only thing missing from my Southern porch makeover was somewhere to sit and enjoy the view. Jo and I created a cozy sitting area with a comfy outdoor patio sofa, a new wooden outdoor coffee table, and tons of pillows.
And of course we added lots of plants and flowers everywhere, to really bring the look together.
Transforming this porch into an inviting and comfortable living space was such an amazing improvement for our home. It's a perfect spot to sip a glass of lemonade and enjoy the breeze.
Resources and Product Links
Hardware and Supplies
- "Orion Gray" exterior paint by Behr
- "Yucatan" exterior paint by Behr
- "Basin Blue" exterior paint by Behr
- Veranda 3/4" PVC trim boards
- Steves & Sons 4-Panel Primed White Steel Front Door with 12" Clear Glass Sidelites
- Kwikset Kevo 2nd Generation Contemporary Square Satin Nickel Smart Lock Deadbolt
- Kwikset San Clemente Satin Nickel Door Handleset with Halifax Square Door
Lighting and Decor
- Aire a Minka Levanto 52" Integrated LED Indoor/Outdoor White Ceiling Fan with Light
- Beacon Square 12" White Outdoor Wall Mount Sconce with Clear Hammered Glass
- Walker Edison Boardwalk Brown Acacia Wood Outdoor Coffee Table
- Hampton Bay Park Meadows Off-White Wicker Outdoor Patio Sofa with Stone Gray Cushions
- Safavieh Courtyard Gray 7ft x 10ft Indoor/Outdoor Area Rug
- Hampton Bay Woven Stripe Rectangular Outdoor Lumbar Pillow
- Hampton Bay Knot Trellis Square Outdoor Throw Pillow
Landscaping
- Pure Garden 16" Tall Black Stainless Steel Outdoor Integrated Solar LED Landscape Lights
- Purple Pansies
- Boston Fern Plant in Hanging Basket
- Endless Summer Bloom Struck Hydrangea Plant
- Purple Creeping Phlox
- Variegated Hostas
Guides and Resources
- Home Depot's Door Installation Service
- Home Depot's Guide for Transforming Your Outdoor Living Space
- Home Depot's Lawn and Landscaping Ideas and Projects
- Home Depot's Landscape Lighting Ideas for your Front and Back Yard





8 comments so far:
Wow, what a transformation! Fantastic job! I'm updating my front porch and getting a vinyl railing installed in the spring, but I've been trying to decide on a railing design for the project. I absolutely love the modern railing pattern you used - I've never seen anything quite like that and I would love to do something similar with my railing!
Ella, thank you! I think this unique railing design adds a lot of charm to my porch.
I absolutely love the railings! I know you explained a little bit on how they were made but do you have any specific information such as what supplies you used, and where you got them? I keep trying to figure out how you did the top and bottom of the railings and I'm stumped! It looks so seamless without holes and gaps in the bottom track and the top sits so nicely!
Sarah, thanks so much! A couple folks have asked for more detail about these railings, so I've just finished a new post that shows how we build them. Check out our Modern Porch Raining Design post for details.
WOW from plain and pass on by to stop, stare and take it all in, your new look is amazing. We have the same columns inside and out and I was looking for a way to modernize with removing too. Could you provide the dimensions of the boards you used to complete the column wraps?
Kay, thank you so much! I'm thrilled with the change, and it gives the house so much more modern character. The PVC boards I used to wrap the columns were 3/4" thick. My round columns were huge, so I had to go with the widest board available to fit around, but you'll need to choose the width that works best for your column size. My suggestion is to experiment with scraps of wood to see what size you need to go around your columns, then get PVC boards at least that big.
Perhaps Imissed it in your blog but what is the blue color on your ceiling? Your project turned out great. Love it all
Wanda, I totally forgot to mention the paint color! I've just added a section up above, but here's the color for quick reference: "Basin Blue" by Behr.