Creating Custom Silhouette Die Cut Designs
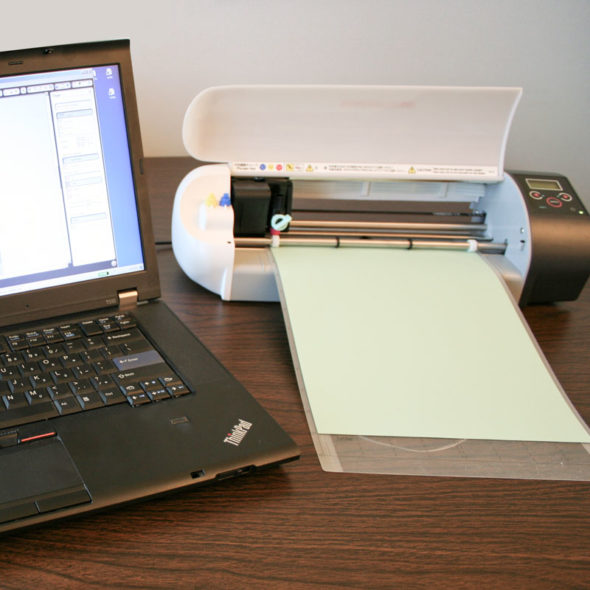
Raise your hand if you've ever needed a custom die cut design for a paper craft project. Me, too! We do a lot of custom stuff here, so I had to learn to make my own cut files for my Silhouette electronic cutter. Thanks to the Silhouette Studio software that comes with it, it's actually a lot easier than you think to create your own custom Silhouette cut files. I do it all the time, and will gladly show you how!
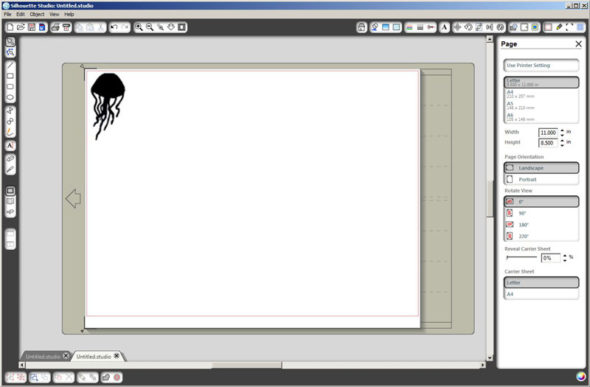
The first step is find a piece of clip art or any image that you want to start with. You can even draw it on paper and then scan it in. The quality of the image is not important at all, just the overall outline and shape. And you'll have the best results if you have an image that's all one color. For this example, I'll be using a jellyfish image. Open your image file in Studio.
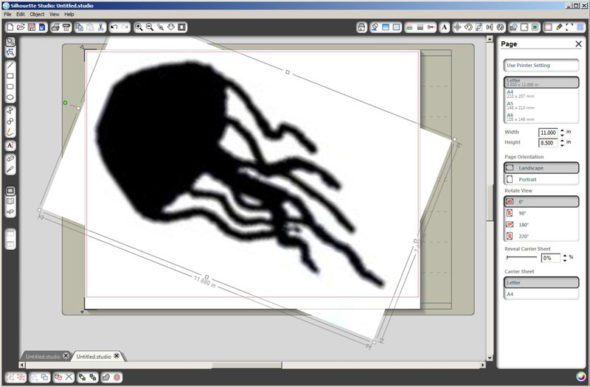
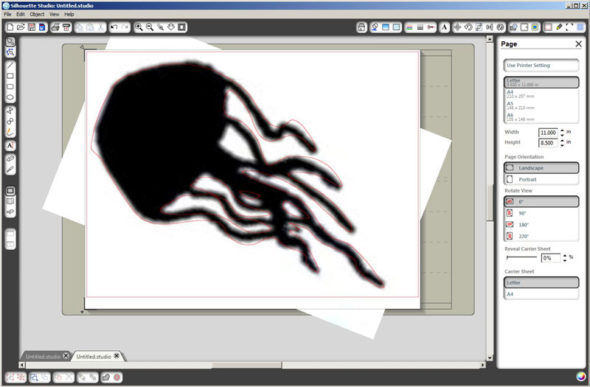
Then click the image to put focus on it and drag the corners until it's as big as you want it to be. You can also rotate it to fit on the page the best way possible. I wanted a giant jellyfish, so I turned mine diagonally and used up all of the page. You'll notice that the image looks terrible blown up big like this, but it doesn't matter. You just need the general shape for now.
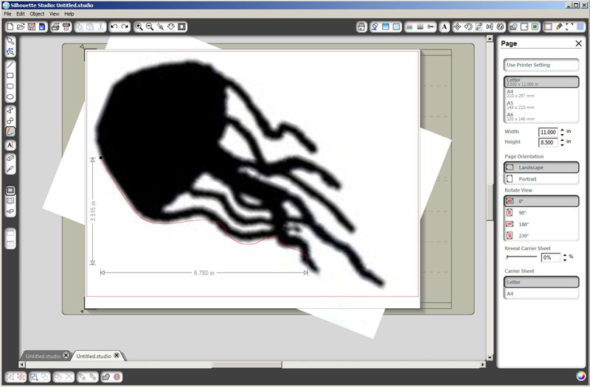
Now choose the freehand drawing tool on the left and start tracing the outline of the shape. Sure, there are lots of other tools that can help you with this, like a "trace edges" and circles and curves, but for me, just drawing it was the easiest. The key to the simplicity is that you don't have to be very good at it -- Studio does the work for you! As you draw, you'll see that the lines automatically curve and bend pretty much in the right direction without you even trying.
In just a few minutes of sketching, I had the whole thing outlined. You can see that I'm not right on the mark with my lines, but I'm close. Close enough for this step.
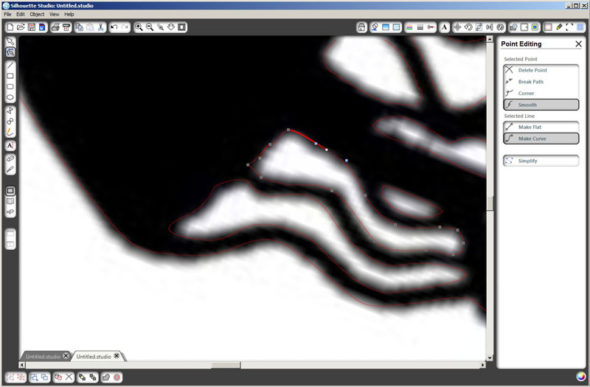
Now for the fun and exciting part. Zoom in on the image and click the red cut line you just drew. You'll see a series of points show up along the line. You can click on these and drag them to and fro, to make your draw lines more closely match the image underneath. Again, they will automatically bend and curve for you, and your drawing just sort of happens. You can add more points to drag by just clicking on the line. It's as fun as it is easy.
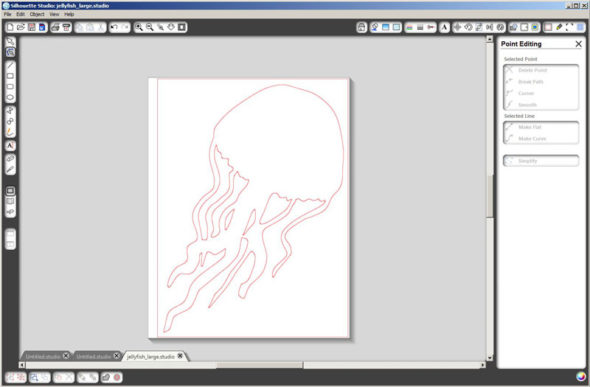
When you're all done, just click on the background image and hit delete, and it's gone. You can rotate the page, too, so that it looks more appealing in preview. All that's left is your outline of your custom cut design!
I can't say enough how much I love this flexibility. Suddenly it's so easy to make custom cut designs based on existing images or on my own creations. The best part is that once you have the design created, you can resize it to any size you want for other applications.
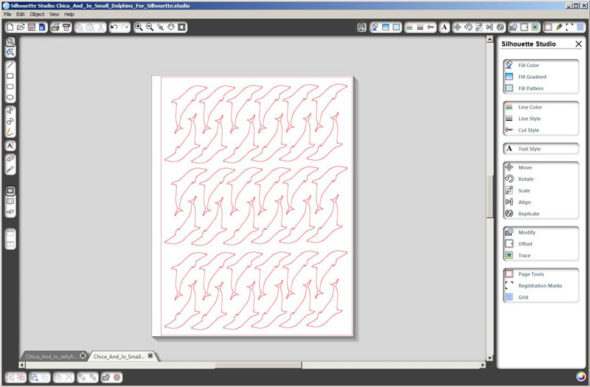
I didn't want to stop there, so I made a dolphin, too. This time I made it really small and then duplicated the image so that I could get tons of 2" dolphins on a page. The tools in the software made this really easy to do.
And because we love to share, here are the small dolphin Silhouette design and large jellyfish Silhouette design for the Silhouette owners among you to download and use. (If clicking these links shows weird text, you'll need to right-click instead and choose "download file" to save these to your computer.)
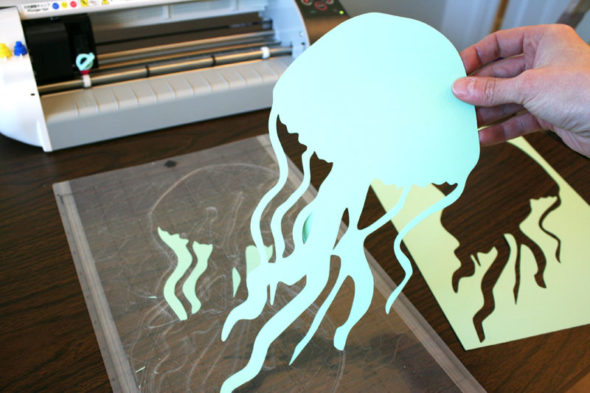
With my cut file created, I went ahead and used the Silhouette to cut out the jellyfish.
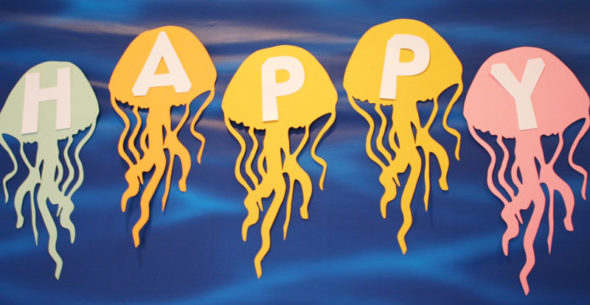
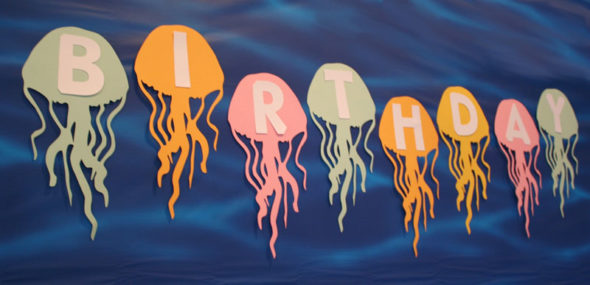
You might think a jellyfish to be an odd choice for my first custom design, but there was method to my madness. I cut an army of jellyfish to make a birthday banner for Little Jo's "Under the Sea" birthday party. I added a letter to each one, then we hung them on the wall so that it looked like they were swimming. This might be my favorite part of the whole party!
And those dolphins I mentioned earlier had a purpose (porpoise?) too. We used double-sided tape to attach two of them together around a toothpick and put them on cupcakes with a big swirl of blue frosting that looked like waves. This was such a simple idea but it had a huge impact.





19 comments so far:
I got my Silhouette SD for Christmas just this past season and I LOVE IT. I'd had my eye on a die-cutter for a while and then when a friend gave us a wedding announcement with her and her new hubby's silhouette on it and told me what machine she used and the rest is history! I've been crafting away ever since! Have fun with your machine and don't forget to check out the Silhouette Online Store...there's a $0.75 cent shape sale that ends tomorrow with a bunch of freebies stuck in there! I think I got 28 shapes for $0.75 (there was one paid one I just adored).
Happy Crafting!!
Courtney, thanks for the tip about the shape sale!
It does sound like quite a machine! Not having to buy all those cartridges that I would probably not often use is a big deal to me, too.
Love that jellyfish! I've been wanting to paint a design like that on a canvas bag.
Can't wait to see what else you come up with.
Baye, great idea! That would be a cute design on a canvas beach bag!
Hi:
I have been hearing a lot of people disgusted with cricut, I am not real happy with the price of cartridges they are way to high. I bought the expression, your right some things you have to cut it to their size. you can make it bigger one way but not the other. so it defeats the purpose. I am holding up buying more cartridges, because I do believe there is something better, but I am going to keep looking and talking to people. I just want something that is independant from my computer. I will keep an eye on what people tell you and recomend.
thanks Marlene
Great job Chica. I just got the eCraft you guys saw at the craft show. I'm a slower learner though
:-)
Marlene: This Silhouette has the capability to use an SD card so you can create designs on the computer, save them to the card and then pop it into the machine and travel without the need for a computer...very handy!
I went on you tube and checked out some videos for the silhouette. I love that you can print something on your printer and then cut it out on the silhouette. Loved your jellyfish banner. The dolphin cup cake toppers was cute also.
It was great to see this process from start to finish. I have an early model cricut and have always wished it was able to make custom cuts. Maybe it's a reason to upgrade. : )
Great tutorial. I got a silhouette about 2 weeks ago so still playing around with it. Im no good at drawing (or tracing) so Ive just been using the trace outline function but its good to see other techniques too.
this is great! But do they have a model that can cut on gumpaste or fondant like the cricut/provocraft?
Haven't seen one yet, Anna. If you want to cut edible cake decorations, you'll need to use the Cricut Cake.
I have not used my creative side in years. The Cricut looks like I could do just about anything: paper, fabric, stencils. And the best part is I would not have to use my uncomfortable scissors, rotary cutters, as my hands just don't do well with those mediums. Thank you.
I LOVED this tutorial! I have never heard of the Silhouette and for years I have been thinking about buying a Cricut, but as Marlene said, I am NOT happy about the price of the cartridges. I like to use my own shapes and I dont see enough images I can use on one cartridge to justify paying $20-$40 for one. I need custom shapes to make my jewelry and crafts. I bought a YuDu screen printer and I was very disappointed about having to buy alot of extra (and expensive) stuff needed to screenprint different designs. Can you tell me if the Silhouette needs alot of extras? Do you have to create the shape on the computer or can you draw it on the paper and cut it out precisely (example: filigree lace)? Does it print AND cut? I really look forward to your answers and any tips you could give me.
P.S. I saw your Harry Potter tattoo tutorial. I loved that too! I'm a BIG HP fan!
Hi Crystal! The only thing I've ever had to acquire for my Silhouette SD is a cutting mat and blades. I haven't even bought any images, because I've created everything I've needed so far on my computer! Eventually the mats and blades will wear out and have to be replaced, but that's the case with any cutter. The Silhouette does print and cut, but not at the same time. If you want to do both, you first design the image in the Studio software by importing graphics, etc, then you use the software to add the "cut lines" on top of the image, wherever you want it to cut. When the design is finished, you first send it to your printer (with the registration marks turned on) and then feed the same sheet of paper through the Silhouette, which then cuts along the cut lines you indicated. It doesn't automatically know where to cut unless you told it where in the software, so if you want to draw a design on paper and cut it out, you would have to scan the drawing, import it into the Studio software, and then add the cut lines (the "outline" tool does a pretty good job of doing this automatically). Then you could print and cut it as I described before. The Silhouette can make very precise cuts, but a fine "filigree" design might be difficult because you might have a hard time peeling it off the sticky cutting mat without it tearing. Hope all that helps you in your decision-making process!
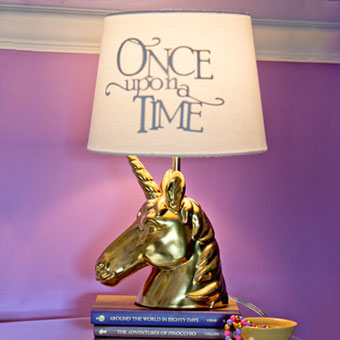
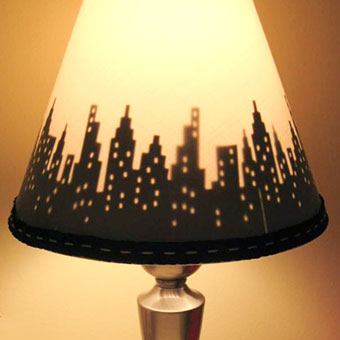
What about the Once Upon A Time thing you did for your reading lamp? I know that was a Cricut but I should be able to use your pdf template you created on my Cameo though, right? I can't get it to work! I even sicked my smarty-britches husband on it and he can't get it to work either! Let me tell you too that this is my first attempt with my Cameo. Just got it for Christmas a few days ago. NEVER touched one before now. I know NOTHING. PLEASE HELP!!!
Nancy, I don't have a Cameo, but I do have a Silhouette SD, which is similar. If your Cameo uses the same "Silhouette Studio" software that mine does, then the tips I mention in this tutorial should work for you, too. The trick will be starting with an image that can be imported. Since Jo's Once Upon a Time lampshade template is a PDF, my guess is that it won't import. Try this -- open up the PDF on your computer, and make sure the whole thing is visible. Then hit the "Print Screen" button on your keyboard, which should copy a picture of your whole screen into your clipboard. Then try pasting that into Studio. If that doesn't work, try pasting it into some image editing software (like Photoshop, Paint Shop Pro, or even Microsoft Paint, which comes with Windows) and save it as a jpg, then import that into Studio. Once you have the image there, you can use the drawing techniques I describe above, or use the "trace" features in the software to create a cuttable design. Hope that helps!
Thanks for the step by step! I just got my Silhouette Cameo and haven't had time to play with the design features. I bought this machine because of all the possibilities! I also like to "do things myself," and I think this machine is perfect for me!
Enjoy your new machine, Falon!