Create Fun Covers for Boring Post-it Notes
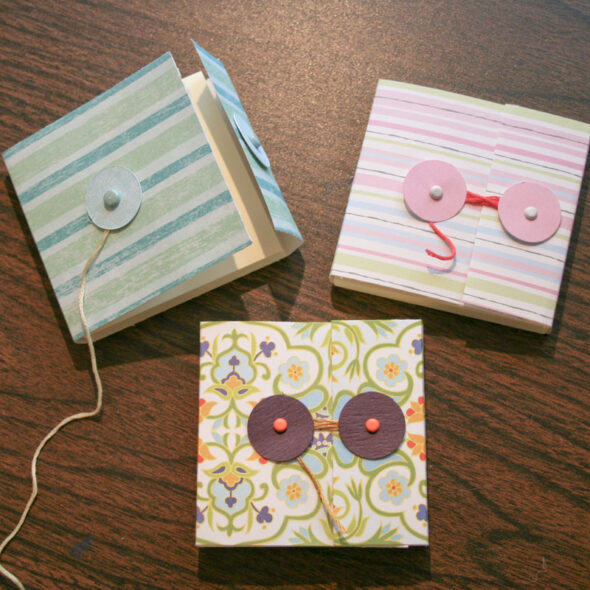
My day-to-day life (both work and personal) depends heavily on Post-it notes, and I use them for all sorts of reminders. I have one set of personalized note pads with my business information and one set with personal information. I've even taken to carrying them in my car or backpack, because they are so handy for quick notes that I need to leave here or there. The problem with carrying them around, though, is that the sheets get messed up as they are tossed about and handled. Then I saw an idea for solving this problem by covering the notepads in a way that not only protects them, but also makes them look so cute I can hardly stand it!
Gather the supplies
The first thing you'll need is a pad of Post-it notes, of course! They are available in a variety of colors and sizes, but the measurements in these instructions will assume you are using typical 3"x3" pads of 100 sheets, which are about 3/8" thick. (Once you get the technique down, you can use other sizes of pads and adjust my measurements accordingly)
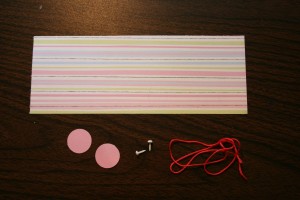 You'll also need a piece of decorative paper or card stock that is cut to 8"x3". This will be the cover for your notepad. Card stock will make a sturdier cover, but regular scrapbook paper will fine too.
(By the way, if you're like me and make a lot of 8"x8" scrapbook layouts with 12"x12" paper, you'll see that this project is a GREAT way to use up that little 4"x12" scrap that's left over. I have tons of those in my scrap box!)
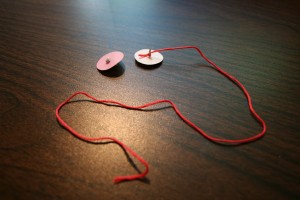
Use a 3/4" circle punch to make two 3/4" circles out of coordinating card stock.
Select two mini brads that match your paper.
Find a piece of embroidery floss (or other thin string) that matches your paper and cut a 12" length of it.
Now that you've got everything together, we're ready to get started.
Make your template
If you're going to make more than a couple of these, the easiest way to get your measurements right every time is to make a template.
The easy way: Just download and print our free template.
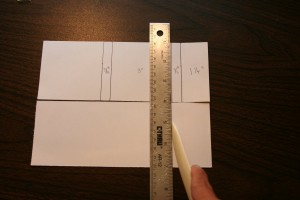
The harder way: Make your own. You'll start with a plain white piece of 8"x3" paper or card stock. Using a ruler and a pen, mark a line 1-1/4" inches from the right side of the paper. Then move to the left another 3/8" and mark another line. Make a third line 3" to the left of the last one, and a fourth line 3/8" to the left of that. That's all you need for a nice reusable template that will make your measuring so much easier from now on.
Score the paper
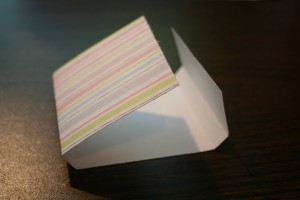
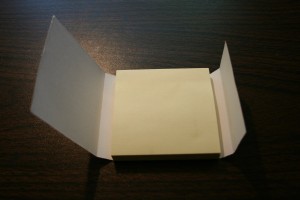
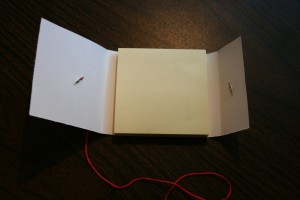
Lay your template face up on your table. Put your printed cover paper right below it, face down, making sure it is aligned perfectly with your template. Place your ruler along one of the lines so that it covers both sheets of paper and use a bone folder to score the cover paper. Continue until all four lines are scored on the cover paper. (See how much easier that was than measuring over and over?) Then fold the cover paper along each of the score lines.
Attach the Post-it pad
Peel the backing off the pad, exposing the sticky area of the last sheet, and stick the pad to the cover. Wow, that was easy, wasn't it?
Attach the fasteners
Start by poking a tiny hole in the center of each of your circles and pushing the brad through it. Do not fold back the brad yet, just leave the legs straight. Now take your floss or string and tie one end around the legs of one of the brads, in a nice knot.
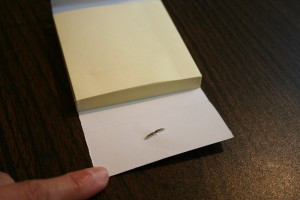
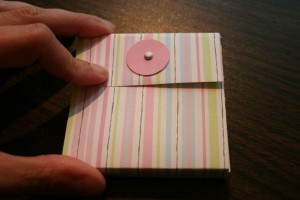
Take the circle/brad that does NOT have the string attached and poke it through your cover stock in the middle of the 1-1/4" portion of the cover. Fold the legs of the brad back to secure it in place.
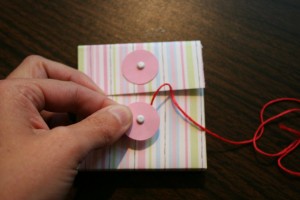
Close the cover on the pad and then take the other circle/brad (the one with the string attached) and find a nice place for it on the cover, being sure to align it with the other circle that you've already attached.
Poke the brad through the cover and fold the legs out on the back to secure it in place.
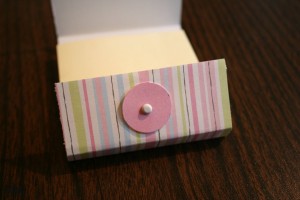
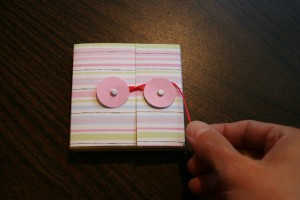
Now take the length of floss or string and loop it in a figure 8 around the two circles a few times, then trim off whatever is left. The string can be wound and unwound repeatedly to open and close the cover.
The results and some example uses
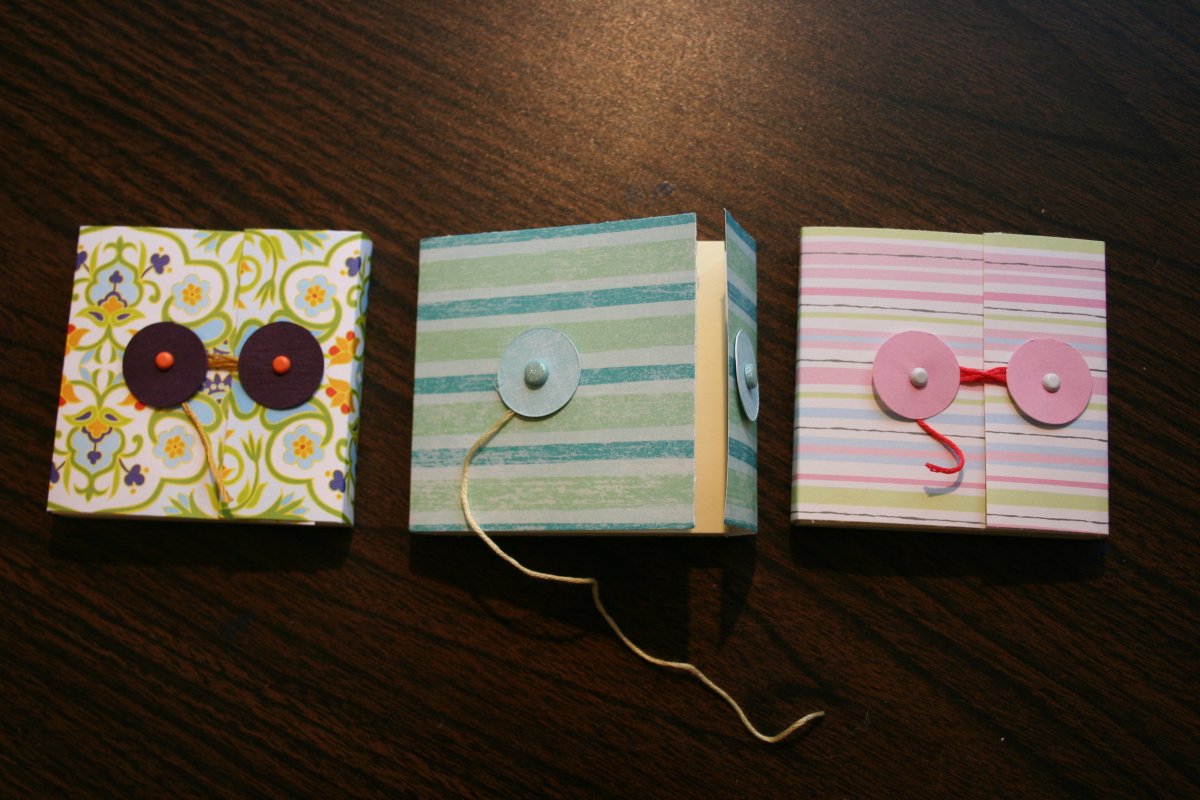
Isn't the finished product SO CUTE?
In no time, you can make a bunch of these with hardly any supplies. Obviously they're great to make for yourself, and you can stash one in your:
- purse
- glove compartment
- backpack
- desk drawer
But these are so cute that they can serve more purposes, including:
- They make great party favors, whether it's for a bridal or baby shower, luncheon, or even a wedding. Imagine cover stock printed with a photo of the bride and groom!
- Let your kids use school-themed cover paper to create fun teacher gifts that their teachers can actually use!
- Kids love anything sticky, and Post-its are no exception. Hand out a stack of these during a play date or birthday party and the kids will have a ball.
- Cover them with Christmas paper and use them as stocking stuffers
- Make them into useful Thank You cards. Next time you receive a gift, write a few grateful words on the first page, pop the whole thing in an envelope, and rest assured that the recipient will be delighted. I wish I had thought of this idea back when I got married!




13 comments so far:
Absolutely wonderful. These are a great idea! I might make one for my mum for her handbag!
I read this idea a while back when I originally stumbled across this AMAZING site, and I have been intending to make them ever since. I finally allowed myself to go to the craft store (it can be a dangerous place for me) to pick up some mini-brads because it was the only part that I thought I didn't have. I realized once I began the craft that I didn't have anything to make the circles out of, and I found that a quarter makes the perfect sized circle. Also, I used the side of a duncan hines box to add some detail since all the cardstock I have at the moment is single color. I posted pictures in the Flickr Pool. Thanks again for this great idea! I love post-it notes and this keeps them safe in my purse or my pocket at work.
Jennie, thanks for the kind words! I know exactly what you mean about craft stores being very tempting! :) I love your idea about using a quarter as a guide, and your re-use of the Duncan Hines box is brilliant. I love it!
If you make one side a bit longer, you can insert those thin magnets that come with pizza flyers under both sides of the decorative cover, and the ends will overlap and stay closed with the magnets. I got one as a gift and loved it so much that I took it apart to figure it out. THe design is nearly identical to your template. They've been great gifts ever since!
Teresa, it's funny you mention that. I think I bought a similar style the other day that I was going to take apart to make a different template!
I love the Post-it booklets. I added a holder for a mini pen (Staples) on the left side for a complete package. Youi need to add 1" to the width to make the pop-out pen holder. Great gift! I also double the paper for the width (7 inches and fold it down to make it stronger. Have made 16 in no time at all.
I love the Post-it booklets. Instead of using the fastners to close it, I used velcro as a fastener. I made the Post-it booklet to complete a set of a personalized notepad, shopping list, and to do list. It was beautiful. I just love your website.
Barbara, what a nice idea to make a set. Would love to see a pic if you would like to send us one!
So far this weekend I have made the kindle cover and a post-it pad. They are awesome. I used buttons and brads for the post-it pad. Very cute!
Melanie, I'm so glad we helped fill your weekend with crafts :)
When I printed the template off it was the wrong size. It was 7 1/2 by 2 3/4 inches. Did I print it off wrong somehow? Thanks for any help. :)
Hannah, make sure that when you print the PDF, you have page scaling set to "none" so that it prints true size. If that doesn't help, this is a pretty easy template to draw by hand if you've got a ruler. Just follow the measurements you see on the template.
I used a Velcro fastener the first time I made a Post-it cover, but found it hard to stick, even with my glue gun, so I will try your idea with the brads. It looks lovely!!! Thankyou